Bull Put Spread
You think price won't fall below strong support (e.g. below the Put Wall). You bet on that and get paid upfront: if it holds above, you keep the money. The risk is capped in advance, even if you're wrong.
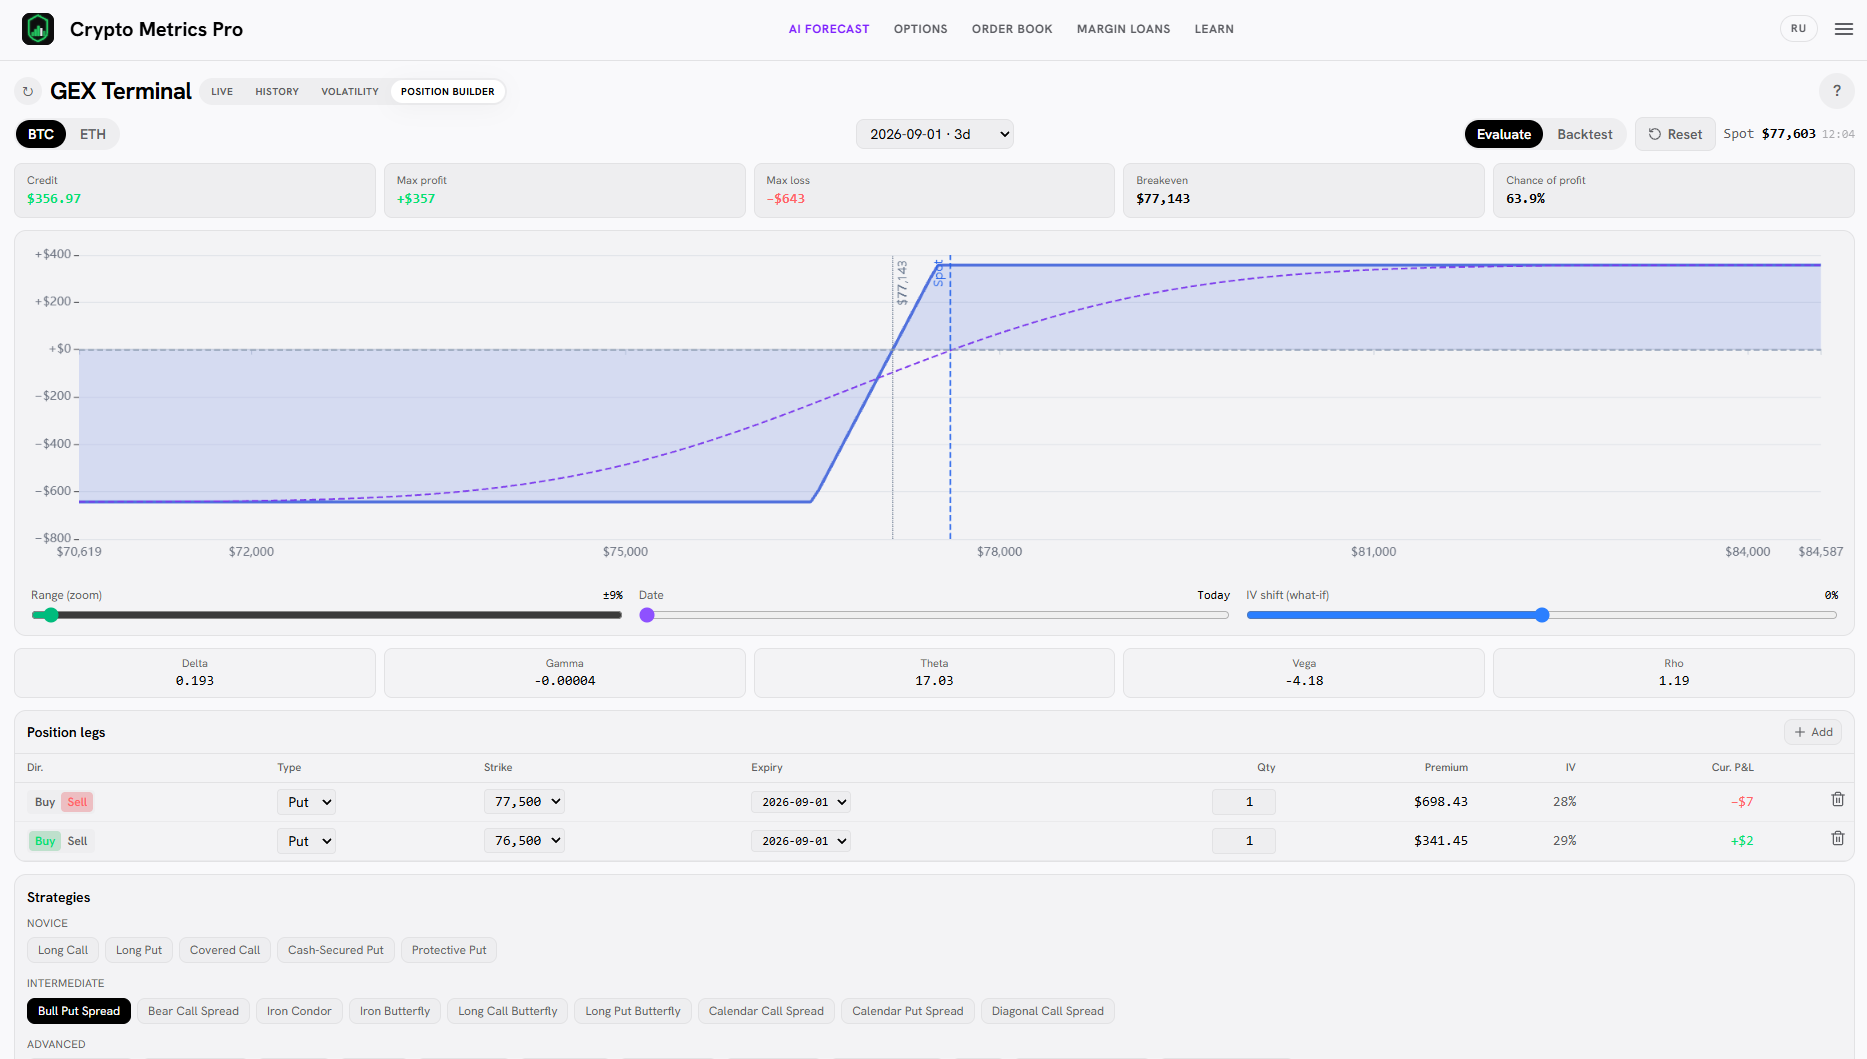
How the Bull Put Spread works
You collect a credit for the sold put and give some back for the lower long put, which caps the loss. If price stays above the short strike, both puts expire and you keep the full credit.
The maximum loss — the strike width minus the credit — is known up front.
Placing strikes at GEX levels
Place the short put at the Put Wall (a large support level) where price is less likely to break; the long put sits lower as insurance. The ideal regime is positive GEX with price above the Gamma Flip.
The Put Wall and Gamma Flip are computed live in the GEX Terminal — build the spread in the Position Builder.
When to open, the Greeks and managing the position
Open it in a mildly bullish or sideways market when the asset has found strong support. Entering in elevated IV pays off — its later drop cheapens both options and speeds up profit-taking. Max profit = net credit, max loss = (strike gap − credit), breakeven = upper strike − credit.
Greeks: positive theta — time works for the spread seller. Management: a break of support below the lower strike puts the loss near maximum, so roll the spread down or close early.
FAQ
Capped: the spread width minus the credit received. You cannot lose more.
The short put strike minus the credit received.
Build the Bull Put Spread on live BTC and ETH quotes in the Position Builder.
Open the Position BuilderRelated strategies
Information is for educational purposes only and does not constitute investment advice. Options trading carries high risk.